How to Create SVGs from Maps with Several Colors
It’s not unusual to find a map which has an additional line or lines in color showing the route of a journey. We want to preserve this color in the final SVG of the map we include with the book. We will use as an example a map reproduced in Through the Brazilian Wilderness by Theodore Roosevelt
-
Find the best quality source scan
You always want to start with the very best scan of the image you can locate. Here’s the top portion of the scan from Through the Brazilian Wilderness:
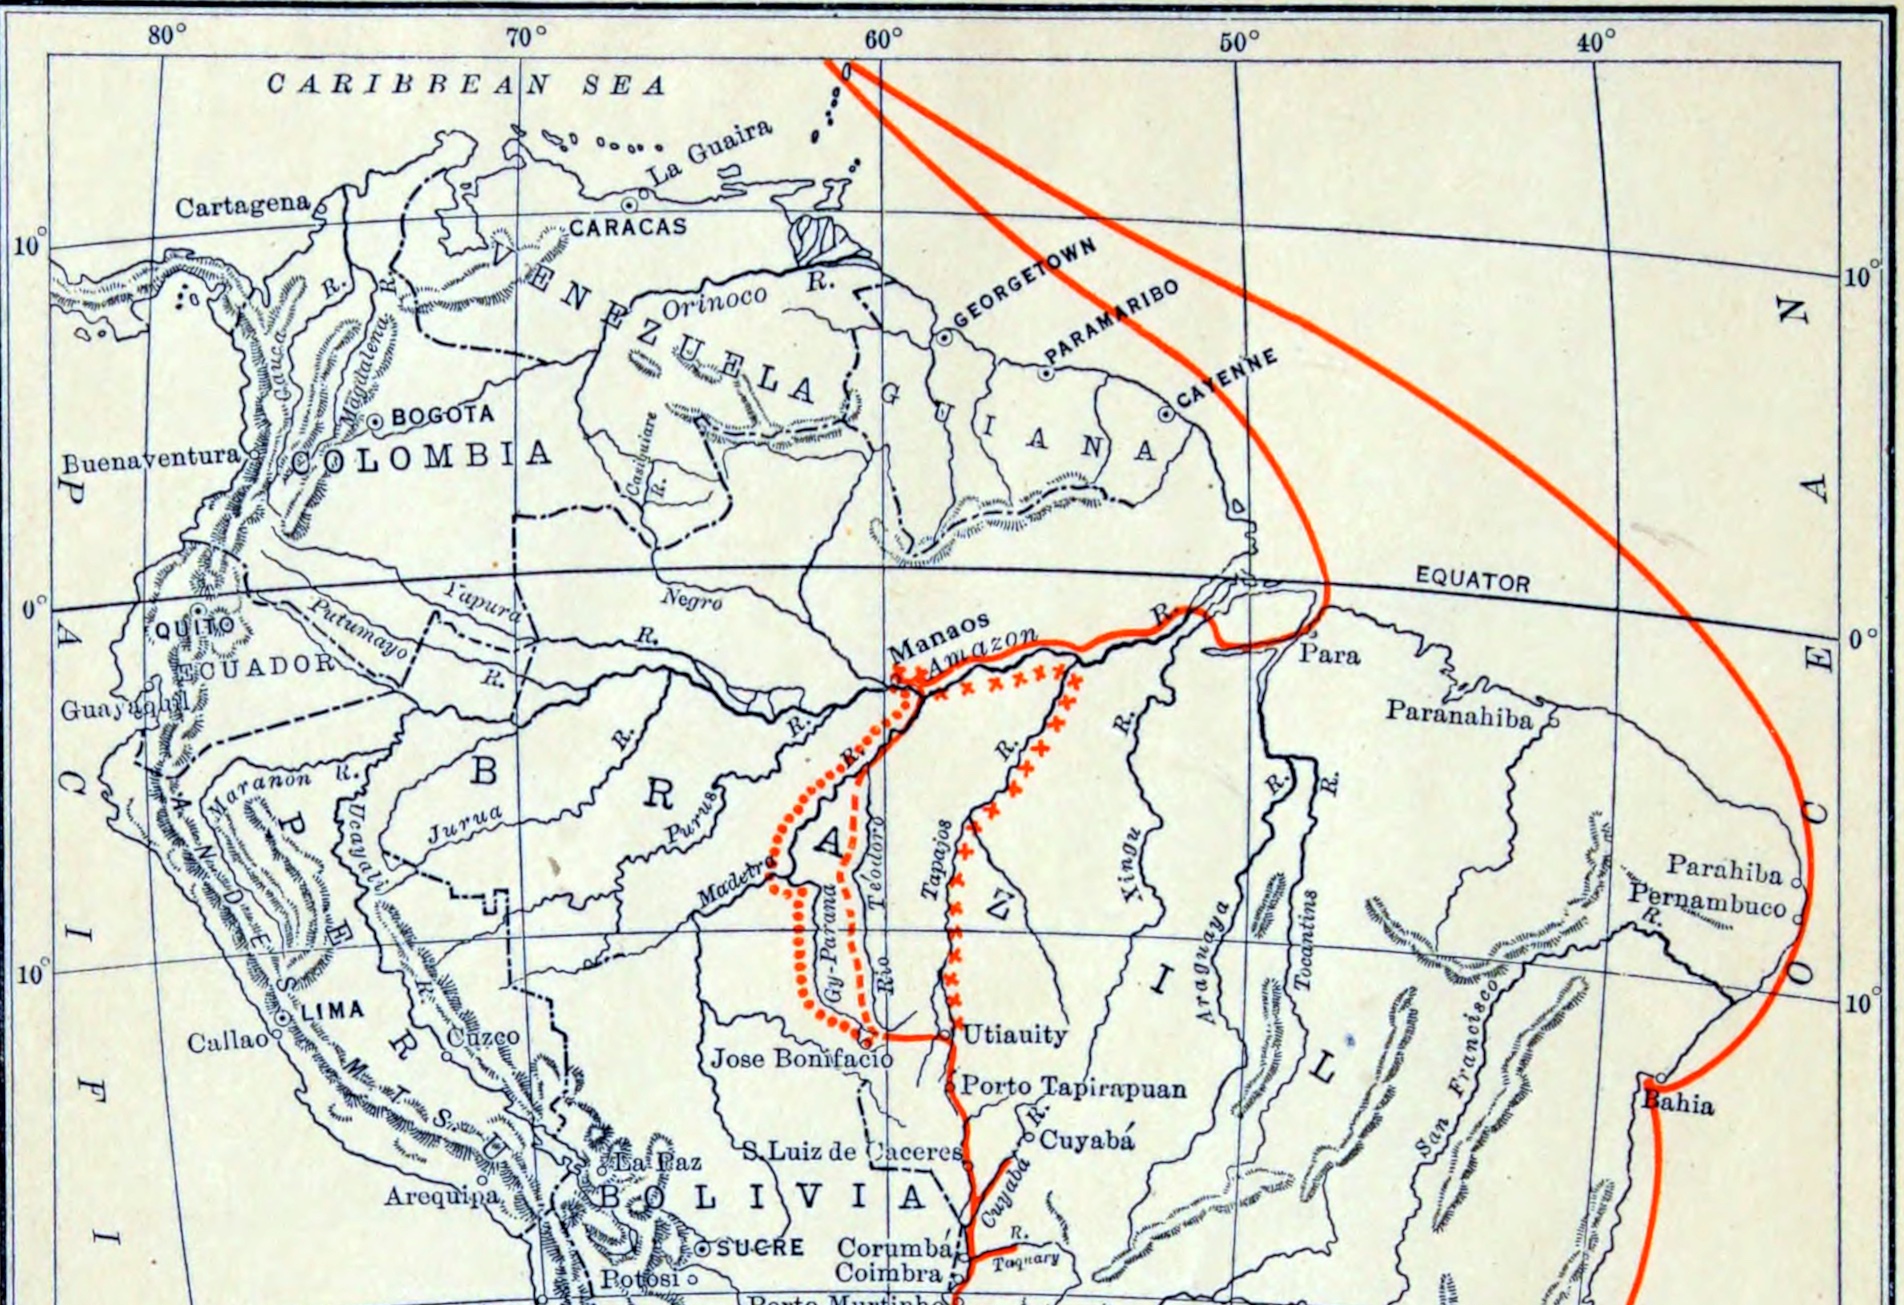
As you can see, there is a red line showing the journey, and an accompanying legend.
-
Process with a suitable bitmap editor
What we need to do before trying to trace the map is to separate out the red lines showing the route from the black lines of the underlying map. We need to end up with two images, one with the red and one with the black.
To do this, I duplicate the source image and then replace the colors I don’t want in each one with the background color. To demonstrate, I’ll use the open-source GIMP graphics program, but any graphics program which can replace one color with another would be suitable.
Open the source file in your editor and immediately duplicate the image layer. If you can rename the layers, call one of them “red-layer” and the other “black-layer”.
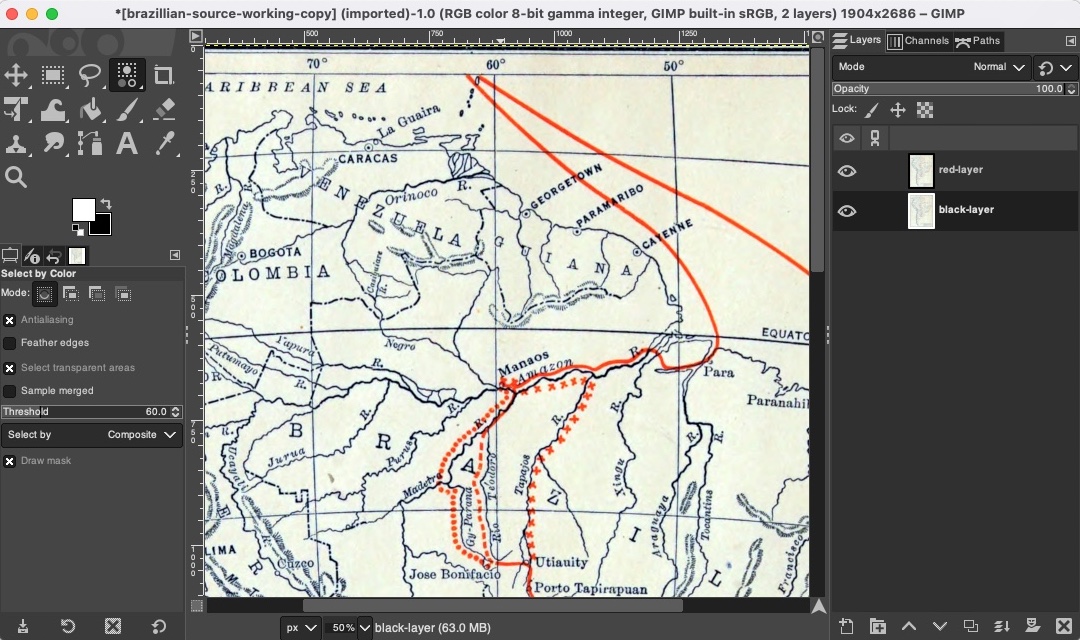
Lock and hide “red-layer” and work on “black-layer”. Now we need to use the Select by Color tool (Select → By Color) to select as much of the red as we can. To do this, I’ve zoomed in quite closely to ensure I can pick the right color and adjust the tolerance up until we can select all of the red we can see. For this image, I’ve used a tolerance of 252 (the maximum).
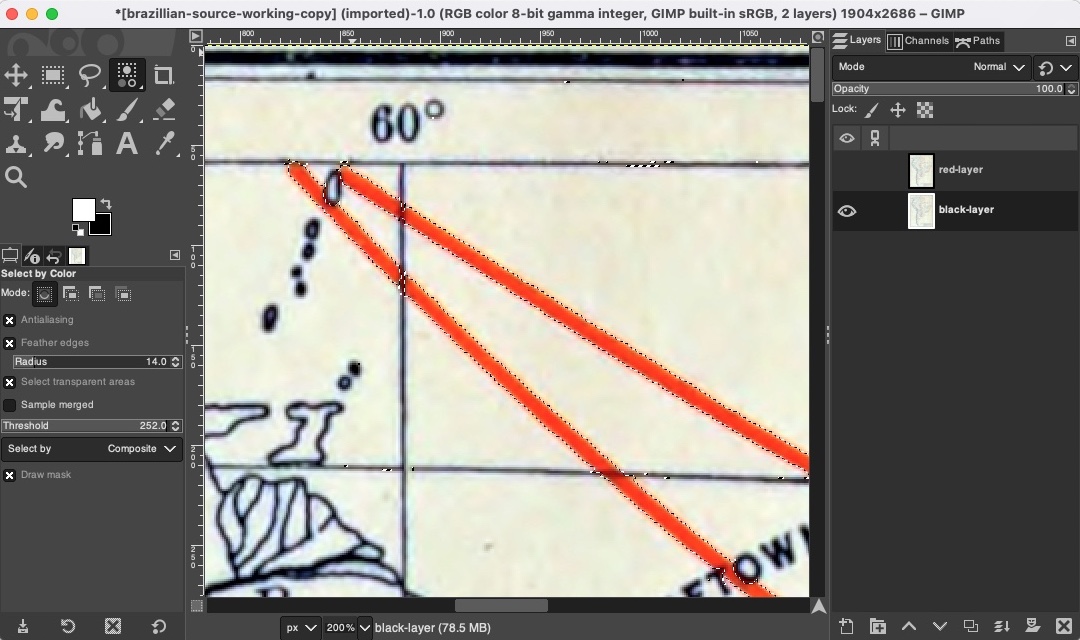
Now we use the Colorize (Colors → Colorize) tool to replace the red with the background color. To be honest, GIMP isn’t great at this process, so we may need to do some manual clean-up as well. It doesn’t have to be perfect: we just need what remains of the red line to be faint enough, so it won’t be picked up during the tracing step.
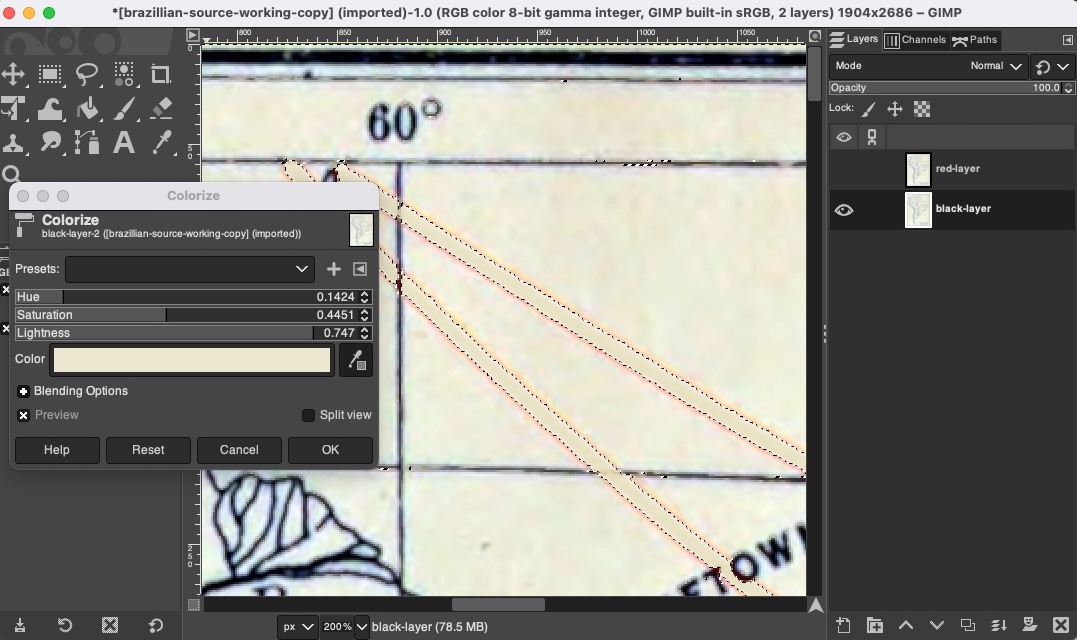
Now lock and hide "black-layer" and work on “red-layer” and do the opposite: use the above procedure to remove the black lines. Alternatively, if this is difficult, use the select color function on the red lines again and copy and paste these to a new layer, which you can name “red-copy-layer”, then delete “red-layer”.
Tip: it’s a really good idea to retain some “anchor points” at the corners of your image, the same location in each layer, so that when you vectorize, each vector will be of the same outside dimensions. The four corners of a map would be good for this. After tracing, we can remove these anchors from the red layer.
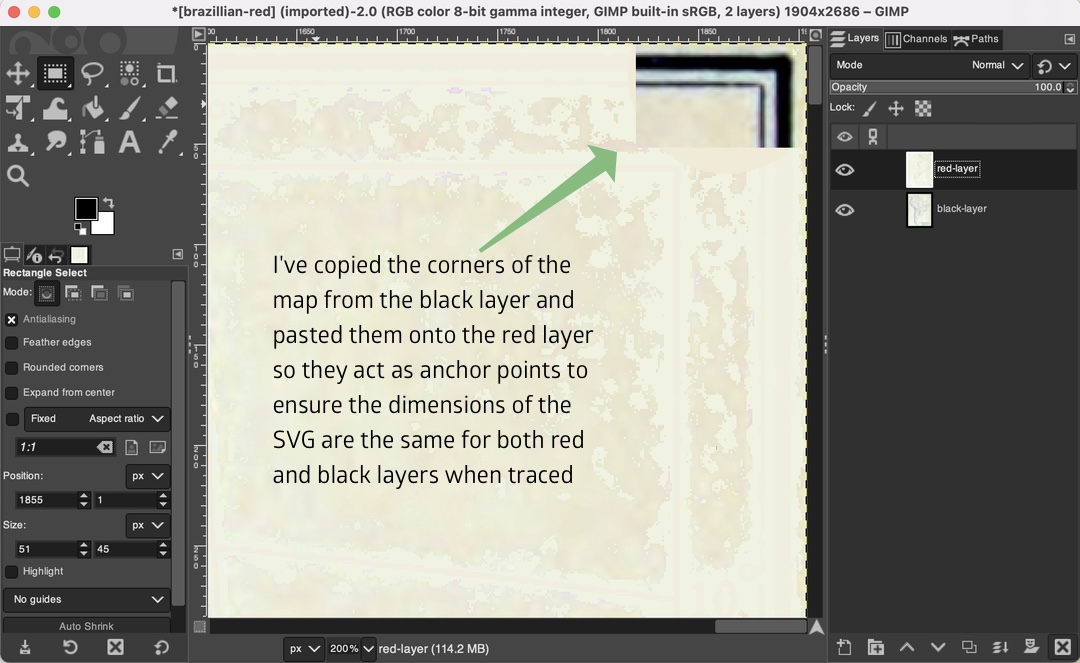
When that’s done to your satisfaction, export each layer separately as a PNG image, with a suitable name such as “red-layer.png” and “black-layer.png”.
-
Vectorize the images
You can use the open-source application Inkscape to trace the bitmaps you’ve created and turn them into vectors, and export them as an SVG.
Use File → Import in Inkscape to open both the red and black PNG images, which will appear as separate layers. Rename the layers appropriately.
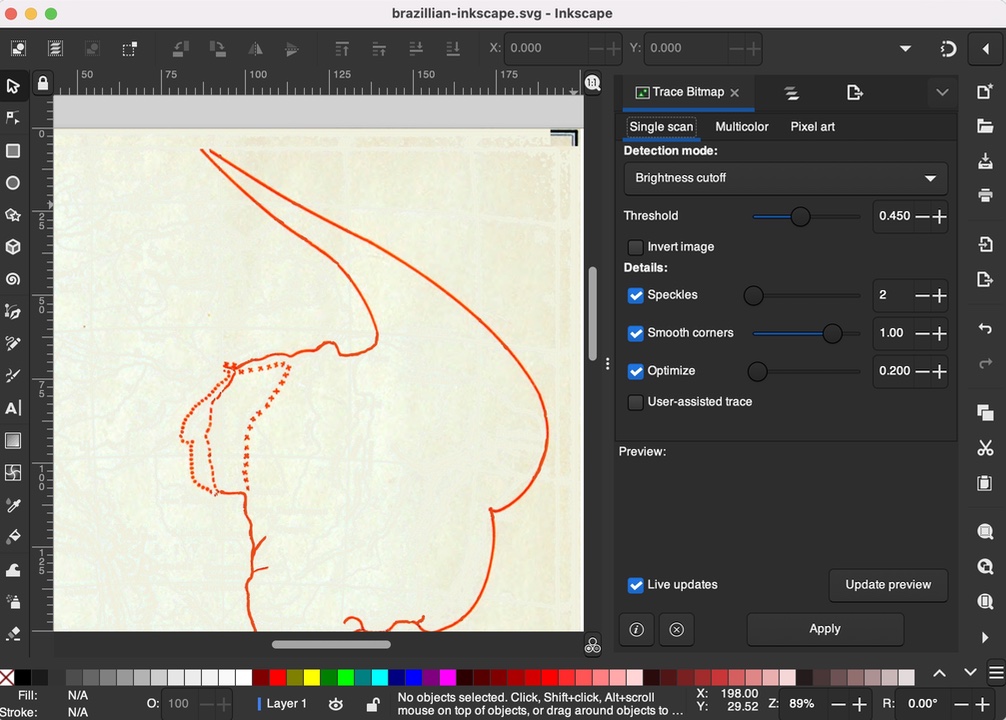
Then use the Path → Trace Bitmap tool on each layer separately, as in the screenshot below. These will appear as additional layers. Name these appropriately and then delete the bitmap layers.
-
Color one layer and export as a single SVG
Now select the “red-vector” layer and apply color to all of the components. If necessary, you can then edit out the anchor points you placed at the corners of the red layer.
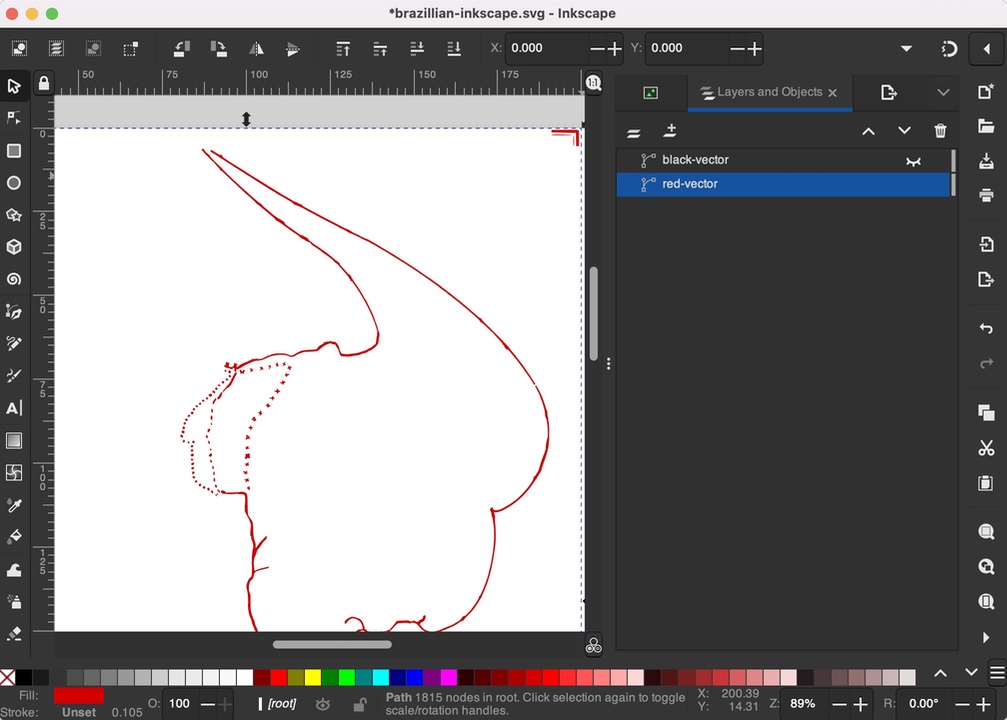
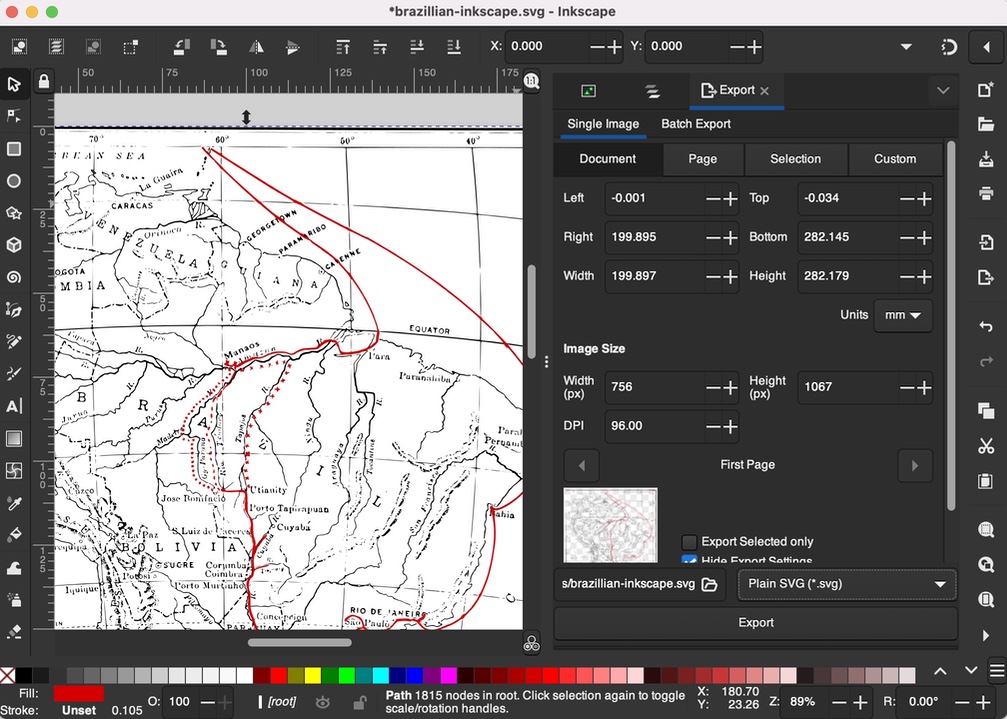
Now make both layers visible and export the combined image as a Plain SVG file, and then apply to that file the various SVG optimizations we prefer.
-
That’s it, you’re done!
-
Note
Inkscape does have a “multi-color” trace function, which in theory ought to eliminate the above steps we needed to carry out in GIMP but in practice I haven’t been able to get this to work in any satisfactory manner.